I read about this technique in the latest issue of KnitScene magazine, but then forgot where I saw it. I tried to describe it in episode 9 of the Unraveling podcast, but I started having doubts about how I was explaining it. So when I edited the episode, I cut that segment out. Then, last week, Knitting Daily published the same story, so I decided to give it a try.
We all know that if you want to add a horizontal stripe to your knitting project, you just need to change yarns, and weave in the ends when you’re done. But what if you want to have vertical stripes? This technique actually marries knitting and crochet to solve this problem.
The idea is that if you’re knitting in stockinette, when you get where you want your vertical stripe, you purl that column on the knit rows, and knit it on the purl rows. This results in a trough, or channel, on the right side that is recessed. After you’ve finished all the knit work, you switch to your crochet hook. You insert the hook, front to back, at the bottom of the column, pick up your contrasting color, and pull it to the front. Then, with the loop you just pulled through still on the hook, insert the hook in the next step of the ladder, front to back, pick up the contrasting color, pull it through, and then pull it through the loop from the previous step. This is just a regular crochet slip stitch. Continue this up the ladder, until you reach the top. Cut the yarn, and weave in the ends.
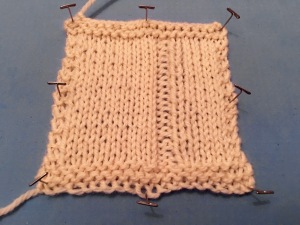
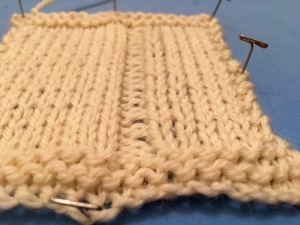
In the sample I made, I did four rows of garter stitch at the top and bottom, and three stitches of garter on the left and right, as a border. I knitted in stockinette for the rest of it, which, I think, was fourteen stitches. When I hit the seventh and eighth columns, I purled on the knit side, and knitted on the purl side. In retrospect, I should have just done a single column; I will only do one column at a time in the future.
In the photo on the left, you can see the whole piece, with the recessed columns near the right. The photo on the right gives you a bit more perspective on how deep the column is.
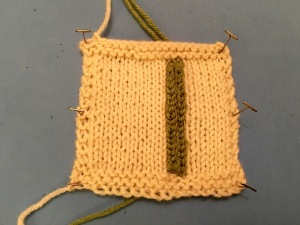
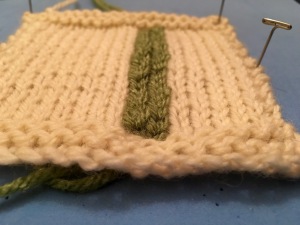
The next step is to do the slip stitches. I failed to take a photo during the procedure, instead only taking them when I was done. You can refer to the original article to see it in action. Below are two photos showing the finished product. I didn’t weave in the ends, since it was just a test, but you would need to do that to really be finished.
It turned out to be harder than I expected to make this stitch look good. I’ve done a lot of crochet, but the way I had to hold the fabric, and how you pulled the yarn through, made it harder. If I do this technique again, I believe I will get a crisper stripe than I got this time.
Go read the article and give it a try.


Pingback: Episode 10: Popping Off The Stack – Unraveling